In order to create a direct drop-ship return in Acumatica, below mentioned are the steps:
- Login to Acumatica site.
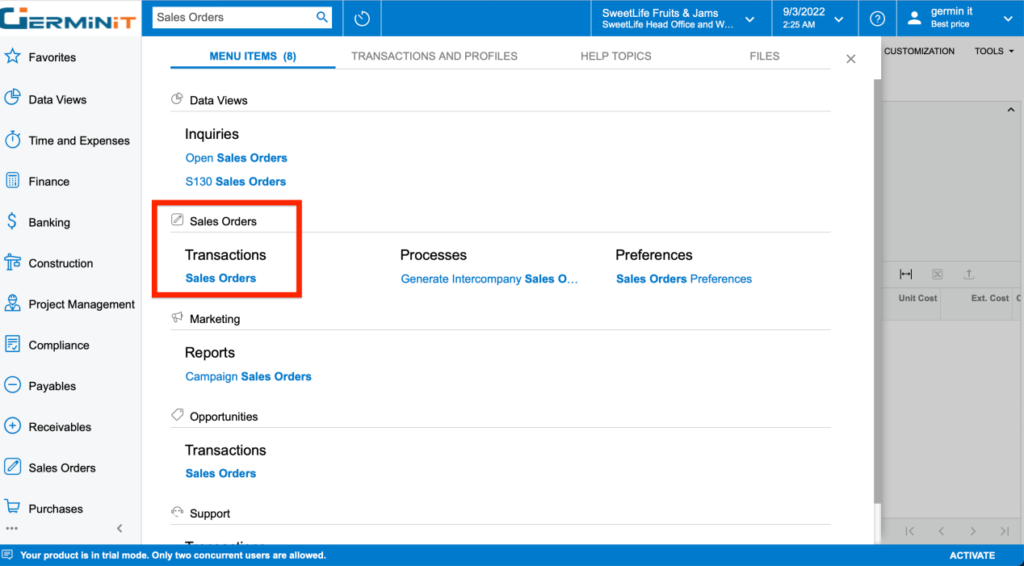
- Search for the Sales Orders (SO301000) form in the universal search bar and create a new order of the RC type.
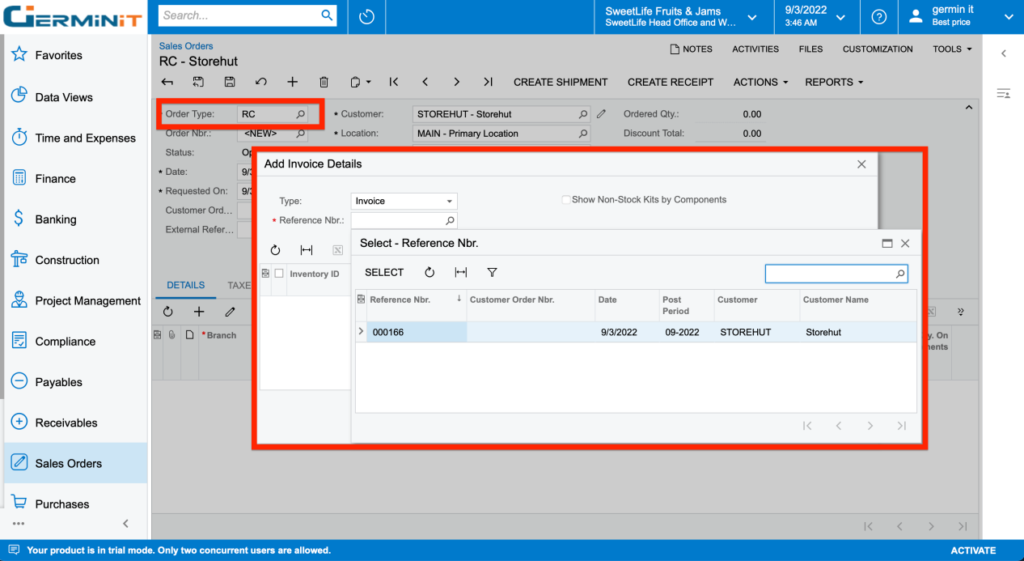
- Add the invoice for the drop ship order for which the return order is to be created. Select the invoice number and the click on Add & Close button.
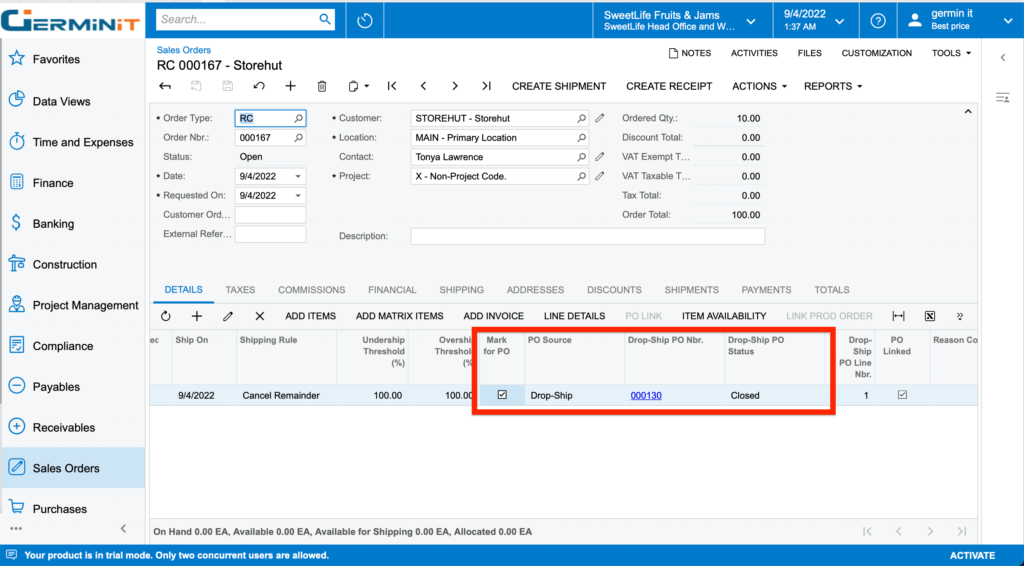
- If required, modify the quantity to be returned.
- Now under the Details tab, check mark the Mark for PO checkbox. As soon as the user selects the check box the values in the PO Source, Drop-Ship PO Nbr. columns get populated by the system.
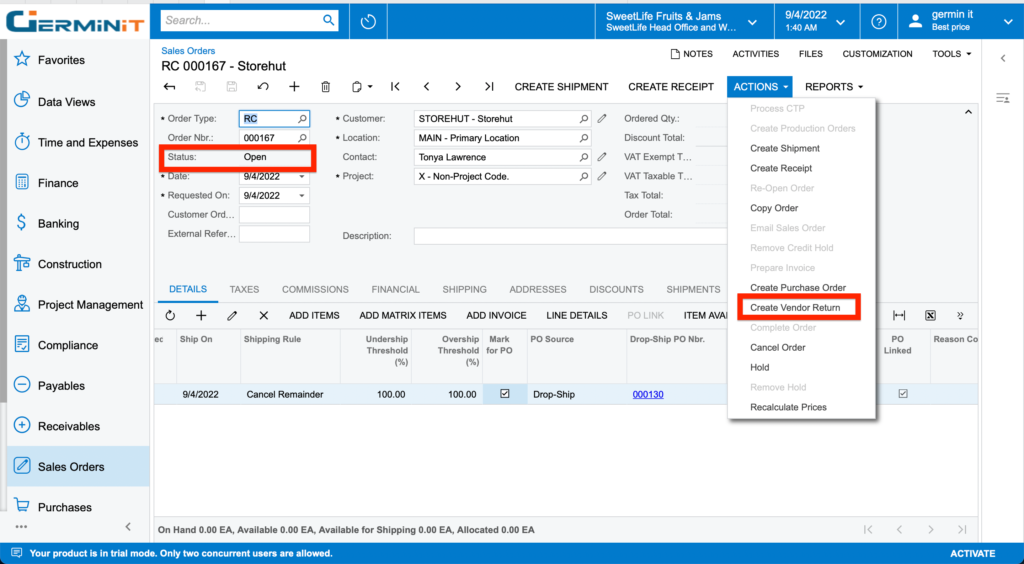
- And at last click on Save button. And the status gets changed to Open. (if status=On Hold then click on the Remove Hold button after which the status gets changed to Open).
- Now under the Actions button select Create Vendor Return option.
- Upon successful processing after selecting, navigate to the Shipments tab where the system displays the Return order number as shown below.
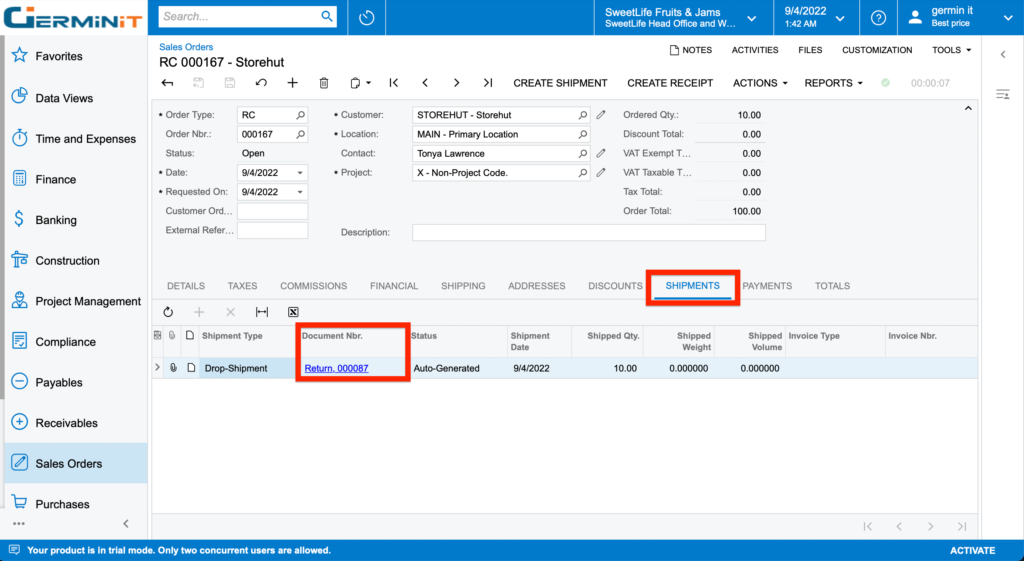
- Now if the user has been given the access right to process the purchase orders in the system, they can head on to the Purchase Receipts (PO302000) form or click on the link under the Shipments tab in order to release the return document.
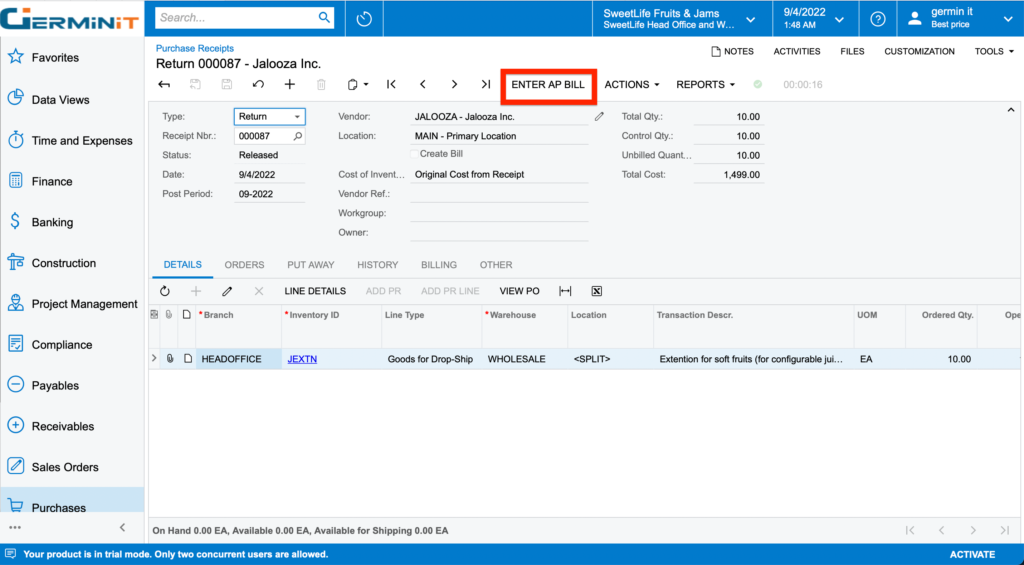
- Click on Release button to release the document. This process would not post any transactions.

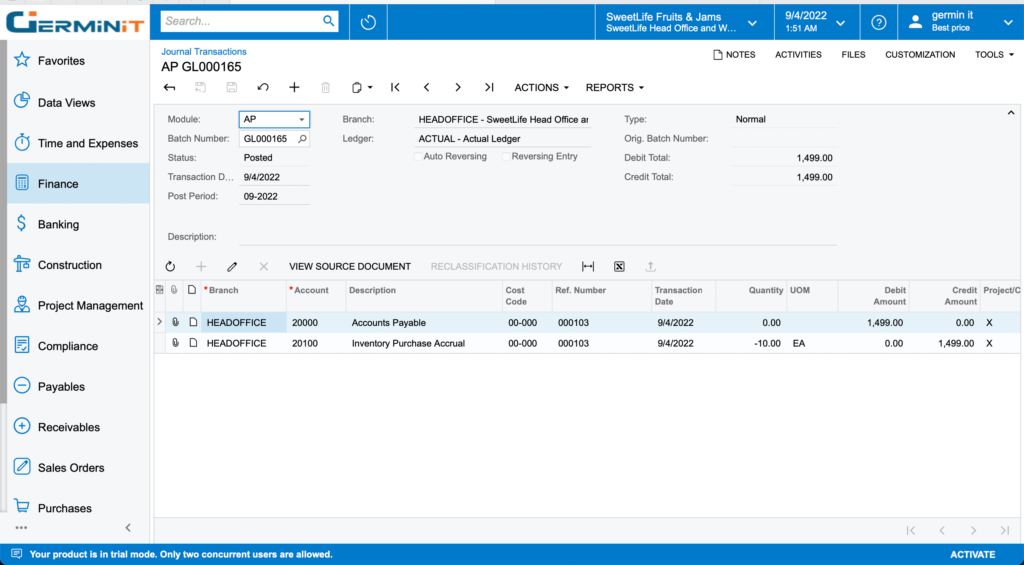
- Now click on Enter AP Bill button. This would redirect the page to the Bills & Adjustments (AP301000) form where this would create a Debit Adjustment for the order.
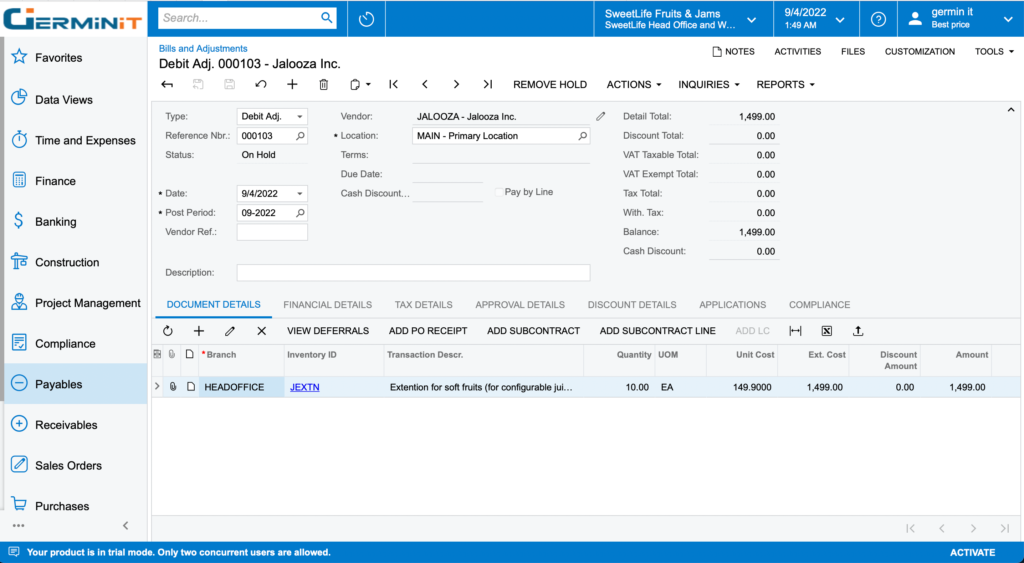
- Click on Save button to save the debit adjustment and then click on Remove Hold button in the form toolbar & hence, release the document.
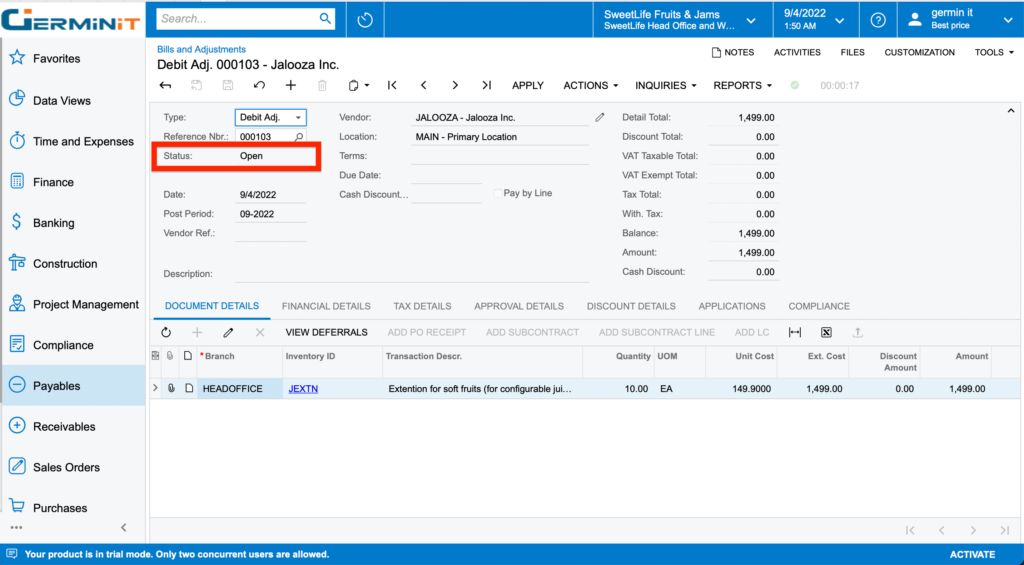
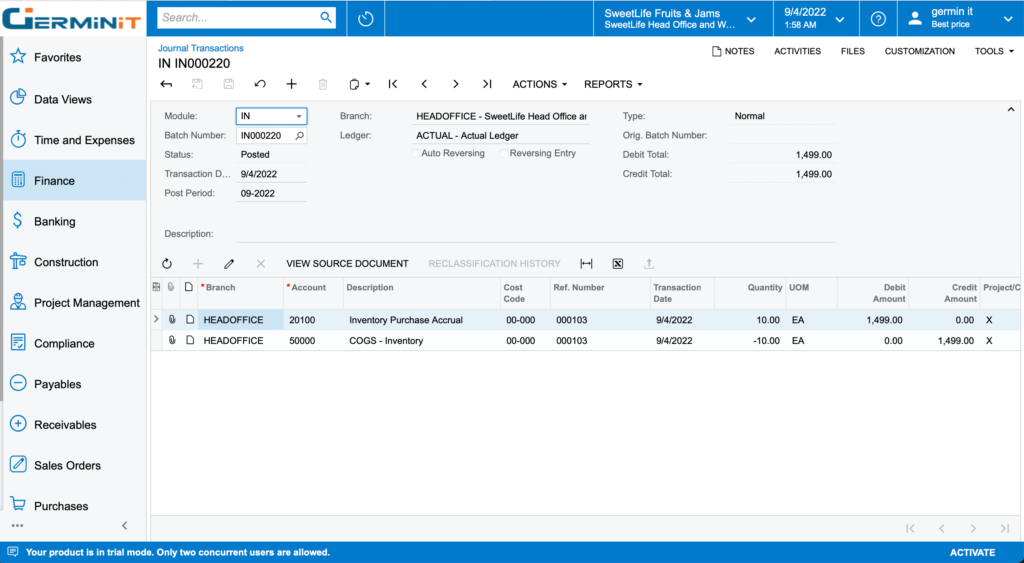
- As soon as the debit adj is released the following transactions get generated.
- Now again open the sales order for which the return order has been created. And then click on the Prepare Invoice button in the form toolbar.
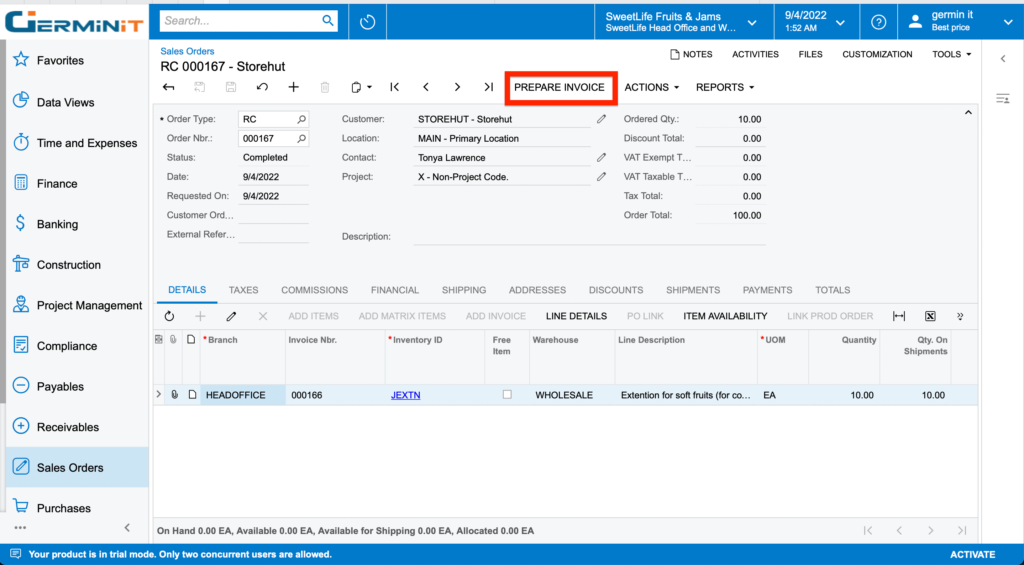
- This would create a Credit Memo on the Invoices (SO303000) form. Release this credit memo by clicking on the Release button on the form toolbar.
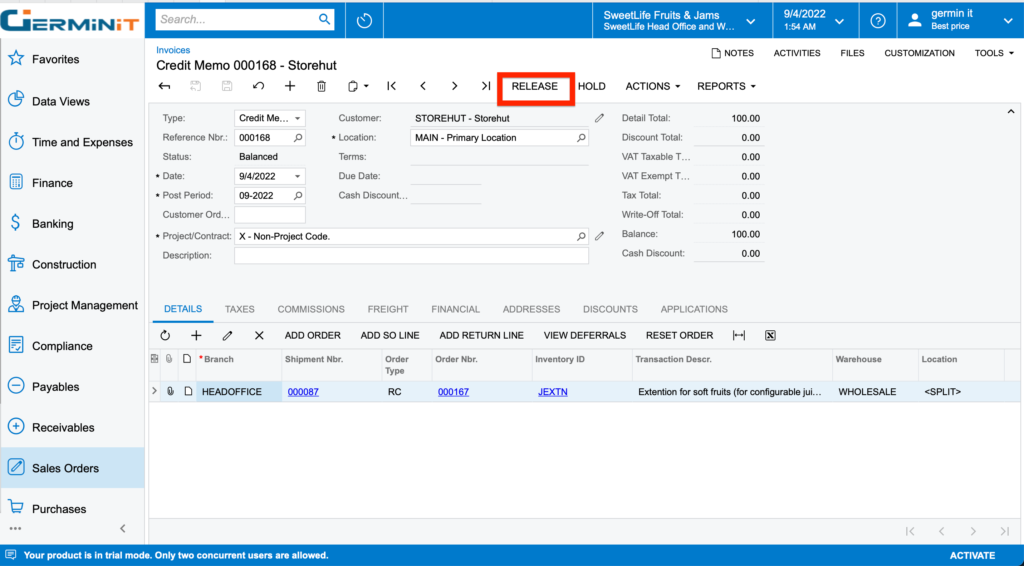
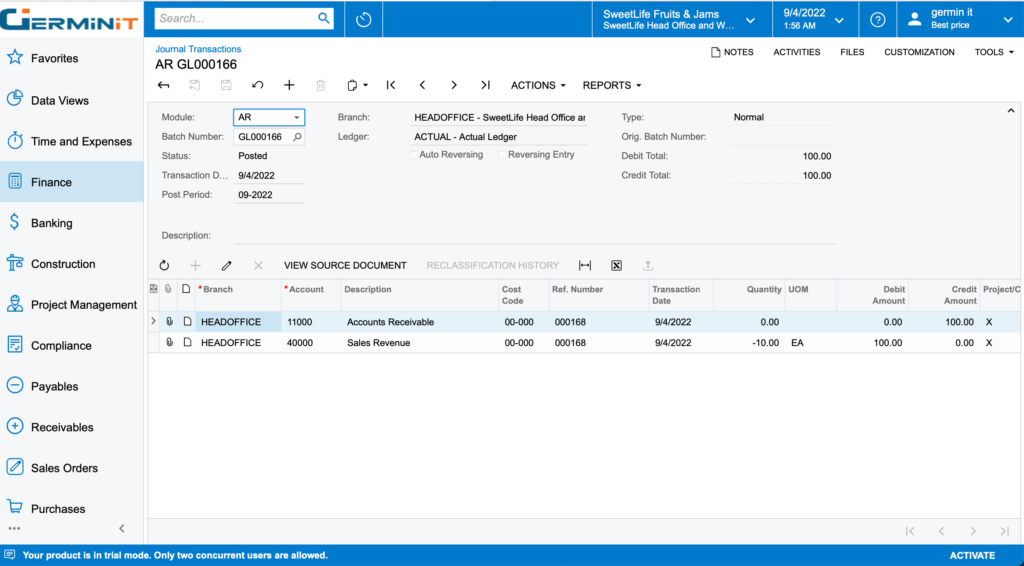
- As soon as the Credit Memo is released the following transactions are generated. And on the same side, the inventory issue document also gets released by the system, depending on the configuration for the same on the Sales Orders Preferences (SO101000) form.
What We Do – GerminIT, one of the oldest ERP providers, is well known for its ERP implementation and customizations. We provide complete end-to-end assistance for data migration, system integrations, technical consultations, and implementation competence, third-party add-on development, and product customizations for clients across the US, UK, Middle East, Australia, Asia, and Africa.