To add the button to any of the screens, we need to select the window to which we need to add it.
- Here in the “ZTST” window, we have a Button/menus tab in which we will select the type as a button.
- Here we can enter the code in alphanumeric in uppercase and lowercase letters (e.g., A, B, A1, A2…).
- In management, we have two types non-validating and validating.
*Non-validating: The controls on the field are not executed before using the button or the menu.
*Validating: The button is executed if all the controls on the fields are valid.
- In button text, we will add the text that needs to display on the screen.
- Here is the activity column, where we can enter the activation code.
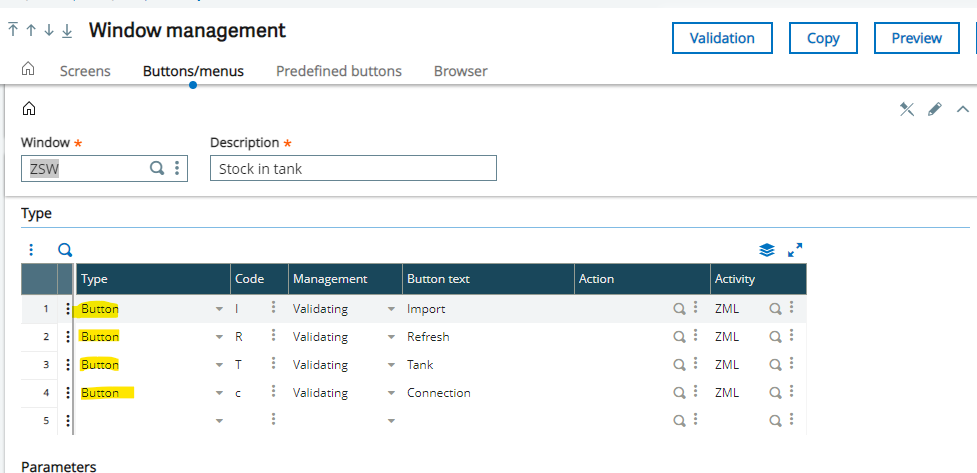
In the below screenshot, we can see a button “Import,” “Refresh,” “Tank,” and “Connection” added on the particular screen.

This blog explains “How to add a button in Sage X3”
For more informative blogs on Sage ERP, subscribe to our newsletter now!