Acumatica Tips: How to add a new checkbox in Acumatica?
Use Case: Let us assume that a user wants to add a checkbox field in the Summary area of the Stock Items (IN202500) screen of Acumatica, as in screenshot 1-
Screenshot 1
The data displayed in the below-mentioned steps are from the U100 dataset of Acumatica.
To add a new checkbox field, below mentioned are the steps:
After logging into Acumatica, create a new project in Customization Projects (SM204505) screen.
Add the existing Stock Items (IN202500) screen; see screenshot 2-
Screenshot 2
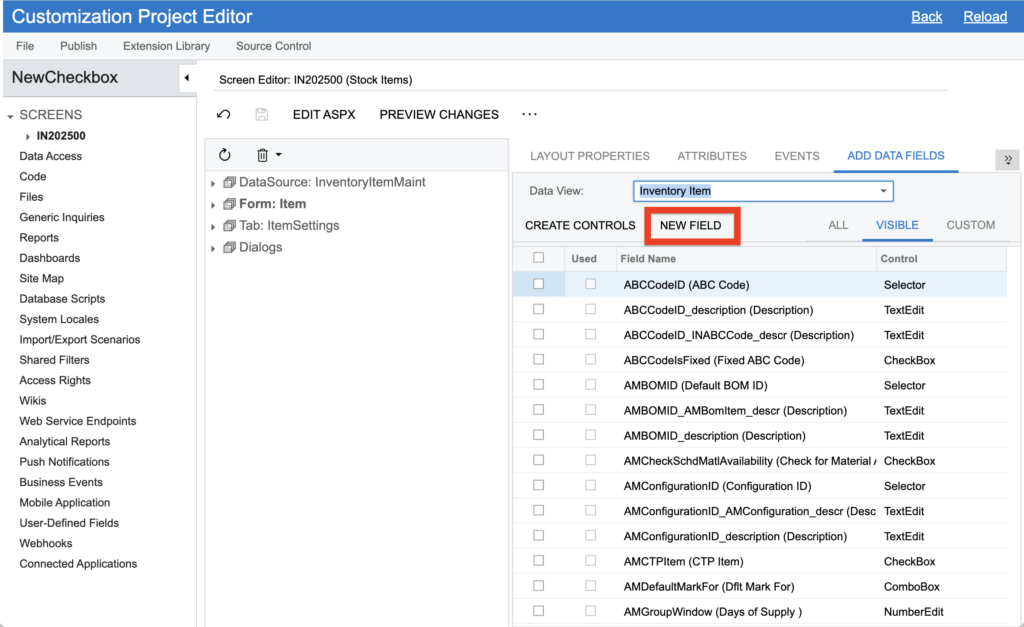
Now select the Form: Item section in the middle pane and select Add Data Fields tab, screenshot 3-
Screenshot 3
Click on the New Field button under the Add Data Fields tab; refer to screenshot 4-
Screenshot 4
Upon clicking it, a pop-up window of Create New Field will open. Enter the details for the new checkbox field, as shown in screenshot five below.
Screenshot 5
Click on the Save button and publish the project, refer screenshot 6-
Screenshot 6
Publishing will allow the system to save the new field in the database and DAC file.
Since the new field is to be added under the Description field of the Summary area, navigate to the Description in the middle pane of the Customization Project Editor.
And click on Add Data Fields tab, screenshot 7.
Screenshot 7
Navigate to the newly created field, select the checkbox and then click on Create Controls button, screenshot 8.
Screenshot 8
And then click on the Save button, Screenshot 9.
Screenshot 9
Publish the project.
And hence, the field has been added; see Screenshot 10.
Screenshot 10
We hope this blog explains how to add a new checkbox in Acumatica. To learn more capabilities of Acumatica, contact us at info@germinit.com