Elevate your business with our guide on activating the Acumatica ERP license. Unleash its full potential and drive growth confidently. Our guide has demystified the process, ensuring you can navigate it seamlessly. Now, armed with this knowledge, you’re poised to harness the true power of Acumatica ERP and drive your business forward.
Use in case: Assume your organization buys an Acumatica ERP subscription in Acumatica Business Cloud. The instance was set up by SaaS engineers. As a system administrator, you have the instance URL as well as the admin user’s credentials. You must now prepare the instance for deployment. You are the first person to log in to the instance and activate and license it using the product key you received from the sales agent. The S1 license tier with three concurrent users and five tenants was acquired by the firm. Your organisation has acquired the basic functionality associated with the Inventory and Order Management group of features in addition to the default set of features.
Step 1: First Use of Enabling Features
To enable features in Acumatica ERP for the first time, do the following:
The Enable/Disable Features (CS100000) form should be opened.
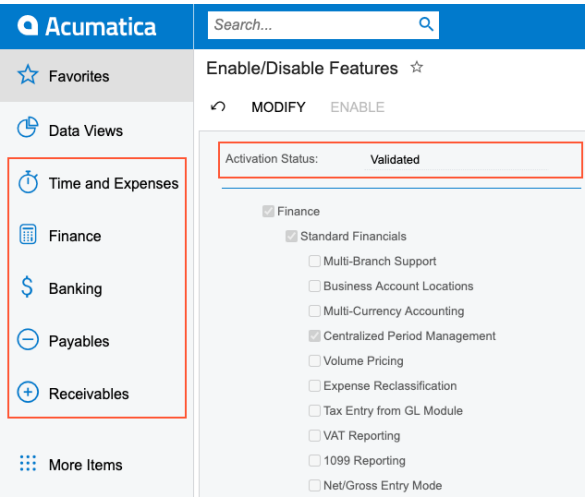
The activation state is Pending Activation, and several features are selected by default.

Enable the specified features by clicking Enable on the toolbar.
The currently selected feature set’s status is now validated. As seen in the accompanying picture, new workspace menu items Time and Expenses, Finance, Banking, Payables, and Receivables have emerged on the main menu (the panel on the left side of the screen) that correspond to the features you have activated. Now you may access the forms in these workspaces.
Step 2: License Activation
Note: Before proceeding with licence activation on a live website, ensure that any Acumatica ERP users have saved their work and signed out of the system. During licence activation, the Acumatica ERP instance will be restarted, and all unsaved work will be lost.
Open the Activate License (SM201510) form and click the Enter License Key button on the form’s toolbar.

Enter the licence key in the Activate New License dialogue box that appears. At the bottom of the dialogue box, click OK.

In the dialogue box, click the link to read the software licensing agreement, and then click Agree to proceed with activation and dismiss the dialogue box.

Examine the license status, validity duration, and number of users and renters in the Summary section. Examine the table to see which features this license enables.


Click Apply License in the Summary section to activate your license, and the system will restart the instance.

Empower your Acumatica ERP journey now! Our comprehensive guide has equipped you with license activation insights. Take charge of your software’s potential and drive business growth. Need further assistance? Connect with us for expert support and harness the full capabilities of Acumatica ERP!
What We Do – GerminIT, one of the oldest ERP providers, is well known for its ERP implementation and customizations. We provide complete end-to-end assistance for data migration, system integrations, technical consultations, and implementation competence, third-party add-on development, and product customizations for clients across the US, UK, Middle East, Australia, Asia, and Africa.